Hello, quic-go! (QUIC implementation with Go)
Overview
This project demonstrates a simple implementation of a QUIC client and server
using the quic-go library in Go. The server listens for incoming QUIC
connections and echoes back messages received from the client. The client
connects to the server, sends a message, and prints the response.
Python version: Hello, aioquic! (QUIC implementation with Python)
Feature Highlights
- QUIC Protocol: Utilizes the QUIC protocol for low-latency, multiplexed connections.
- TLS Encryption: Uses TLS for secure communication between client and server.
- Self-signed Certificates: Generates self-signed certificates for local testing.
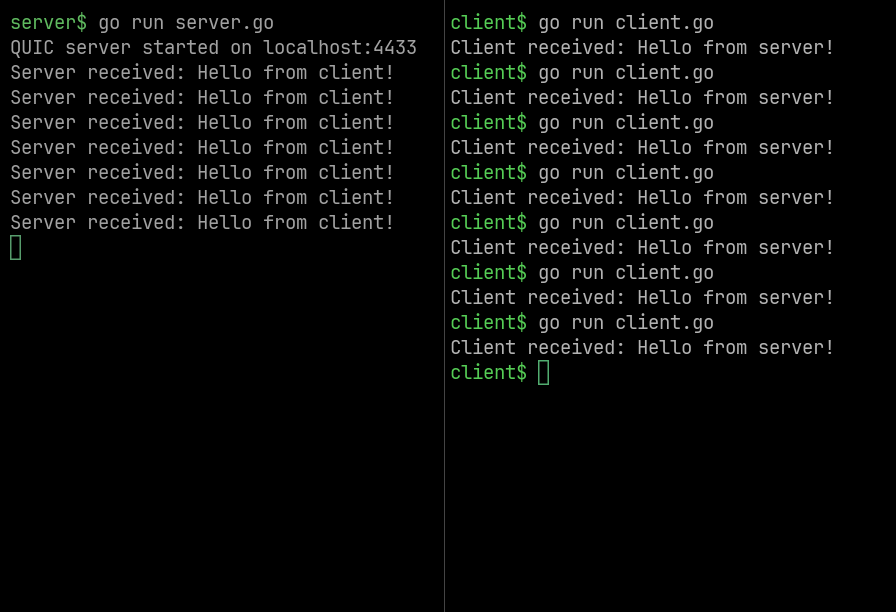
Screenshots
Use Cases
- Learning: Understand the basics of QUIC and how to implement it in Go.
- Prototyping: Quickly prototype applications that require low-latency communication.
- Testing: Test QUIC-based applications in a local environment.
Technologies Used
- Go: The programming language used to build the application.
- quic-go: A Go library for the QUIC protocol.
- OpenSSL: A robust, full-featured open-source toolkit for SSL and TLS.
Environment Setup
Install Dependencies
OpenSSL is required to be installed.
The following command is for Ubuntu and Debian-based distributions. For any other OS or Linux distribution, check the relevant documentation.
sudo apt install openssl
Create Project Directory
mkdir quic-go
cd quic-go
Initialize Go Module
go mod init quic-go
Install Go Dependencies
go get github.com/quic-go/quic-go
Generate Self-Signed Certificate for Localhost
This certificate is for local testing purposes only. For production use, a trusted Certificate Authority (CA) should be used.
openssl req \
  -new \
  -newkey rsa:2048 \
  -days 365 \
  -nodes \
  -x509 \
  -keyout key.pem \
  -out cert.pem \
  -subj "/CN=localhost" \
  -addext "subjectAltName=DNS:localhost"
Code
Create Server
Create the server file server.go with the following content:
package main

import (
    "context"
    "crypto/tls"
    "fmt"
    "io"
    "log"

    quic "github.com/quic-go/quic-go"
)

func main() {
    // TLS config
    tlsConfig := generateTLSConfig()

    // Start QUIC listener
    listener, err := quic.ListenAddr("localhost:4433", tlsConfig, nil)
    if err != nil {
        log.Fatal(err)
    }
    fmt.Println("QUIC server started on localhost:4433")

    for {
        // Accept a new session
        session, err := listener.Accept(context.Background())
        if err != nil {
            log.Fatal(err)
        }

        // Accept a stream
        stream, err := session.AcceptStream(context.Background())
        if err != nil {
            log.Fatal(err)
        }

        // Read data
        buf := make([]byte, 1024)
        n, err := stream.Read(buf)
        if err != nil && err != io.EOF {
            log.Fatal(err)
        }
        fmt.Println("Server received:", string(buf[:n]))

        // Reply
        _, err = stream.Write([]byte("Hello from server!"))
        if err != nil {
            log.Fatal(err)
        }
    }
}

// Load TLS cert + key
func generateTLSConfig() *tls.Config {
    cert, err := tls.LoadX509KeyPair("cert.pem", "key.pem")
    if err != nil {
        log.Fatal(err)
    }
    return &tls.Config{Certificates: []tls.Certificate{cert}}
}
Create Client
Create the client file client.go with the following content:
package main

import (
    "context"
    "crypto/tls"
    "fmt"
    "io"
    "log"

    quic "github.com/quic-go/quic-go"
)

func main() {
    tlsConfig := &tls.Config{
        InsecureSkipVerify: true, // for self-signed cert
    }

    // Connect to server
    session, err := quic.DialAddr(context.Background(), "localhost:4433", tlsConfig, nil)
    if err != nil {
        log.Fatal(err)
    }

    // Open a stream
    stream, err := session.OpenStreamSync(context.Background())
    if err != nil {
        log.Fatal(err)
    }

    // Send message
    _, err = stream.Write([]byte("Hello from client!"))
    if err != nil {
        log.Fatal(err)
    }

    // Read reply
    buf := make([]byte, 1024)
    n, err := stream.Read(buf)
    if err != nil && err != io.EOF {
        log.Fatal(err)
    }
    fmt.Println("Client received:", string(buf[:n]))
}
Directory Structure
After creating the above files, project directory structure should look like this:
quic-go/
├── cert.pem
├── client.go
├── go.mod
├── go.sum
├── key.pem
└── server.go
Running the Application
Run Server
Open a terminal, go to the project directory, and then run the following command:
go run server.go
Run Client
Now open another terminal, go to the same directory, and then run the following command:
go run client.go